
Measure sheet metal perimeter + Free Macro


Problem description
During my work on one interesting project I got stuck. First I had the problem with a boundary measurement of some specific face. In other words, sheet metal perimeter length was the main goal to achieve. After that, I had a problem with part dimensions measurement. And the third problem was, how to unfold sheet metal part. So, my goal was to get dimensions of a fold sheet metal part, unfold that part and take dimensions in that state. Also, I needed a sheet metal perimeter of that unfolded sheet metal part.
With this in mind, the division of the problem into several parts was indispensable.
Problem of measuring sheet metal perimeter
I found this topic https://www.eng-tips.com/viewthread.cfm?qid=377309
Hello everyone,
Is there a “quick” way of measuring the complete edge of a complex part? (or any workaround)
I have unfolded sheet metal part and need to know outer edge length so I can determine how much time we need for machining…
Thanks.
You can read more about this on the link above.
Solution for this problem are simple steps below.
- Switch to GSD
- Make extract of the surface using Tangent Continuity
- Make boundary of it
- Measure that boundary
With this in mind, macro with an integrated surface selection that can do those steps above was created. To use this macro user needs to select one face and the macro will measure the boundary of it. This was not a hard task to do. We took advantage of macro record, record those steps and add selection in it.
Read more about selection here: Macro selection
This is the solution to the first part of the problem.
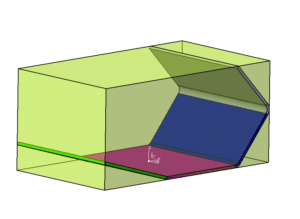
Bounding box creation
This problem was hard to figure out. Also, there are a lot of posts on this problem on forums.
You can check this one: Bounding box
I figure out first how to do it manually and then I wrote the code. The code was long for this and I needed some time to do it.
The result of the bounding box is shown on the left side.
CATIA extremum is key to get this bounding box.
Fold/unfold
I thought this will be easy, use the command to unfold and then just fold it back. But no, an option like that does not exist, or I didn’t find it.
Again I start searching for the solution on the forums, but not a lot of success.
Here are some posts: Unfolded view ;Eng-tips
I’ve an extensive assembly (imported from step) that has a big number of sheet metal components. O need to convert it one by one to sheet metal, then create an unfold view in drawing with the blank size.
Do You have seen any macro to do this?
This is kinda the same problem as I had.
In the end, I got the solution for this, there is an option to copy As Result With link Flat mode. Using this I was able to do it. You can find more info on this link.
After a lot of research and time spent I had the full solution to my problems.
Using all of this I made the app and also add some more stuff to it.
I used my code from project of capturing CATIA screen, read more here: Take picture CATIA Macro
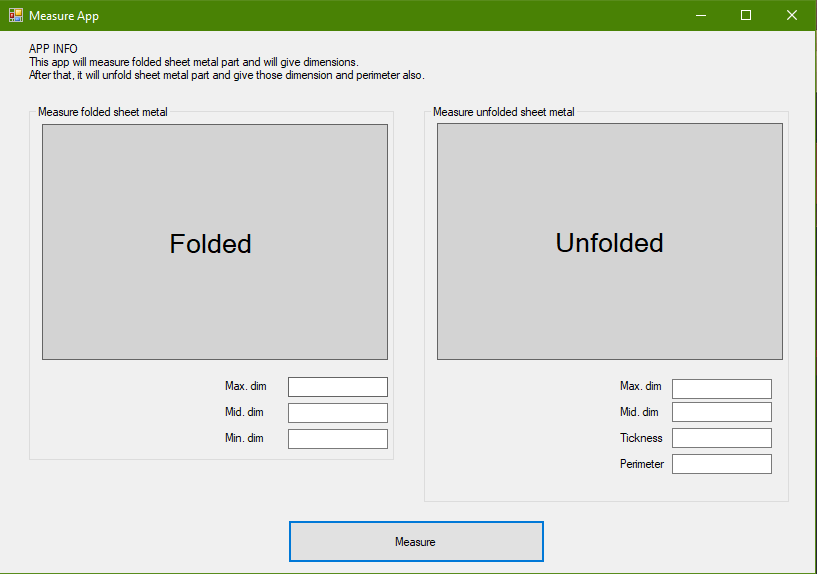
Result
Steps in the app:
1. Measure folded sheet metal
2. Take a picture and set it to the picture-box
3. Write dimensions into text boxes
4. Unfold the sheet metal
5. Re-frame on so users can click on the face
6. Measure unfolded sheet metal
7. Take a picture and set it to the picture-box
8. Show the message to interact with a user
10. Use selection from user and measure sheet metal perimeter
11. Write dimensions into text boxes
12. Clean the part
This app is very adoptable to fit other problems.


This macro will more usefull if you can write the values of the sheet metal in a parameter, so you can read it on the sheet drawing. With this, the supplier can prepare a sheet to cut with a specific dimensions
Hello, thank you for the answer, I think this was wish it the client, or I took just small piece of code and put to the site.